
Update 6th December, 2017: new version 1.09!
Update 27th December, 2018: new version 1.10!
Update 12th November, 2019: new version 1.11!
Don’t you know that feeling, when you just want to do something, but not enough to start actually doing it…. and then something else make you think again to that project, but you’re lazy so you still don’t begin… and then something more kicks in, and you just realize that NOW you want to do it?
That happened to me with this Compustar emulator.
I wanted to write a software emulator of something vintage but at the same time not too complex, because I just wanted to have fun and I did not want to start a big software project.
Then I wanted to learn how to use the Celestron Compustar we have at the “Osservatorio Città di Legnano” (link here, italian only), but my time at the observatory was quite limited and the documentation was partially missing.
And then, the new 2009 EPROMs arrived from Tom Sorbel and I had to install them (Angelo… you fix computers, right? Would you please install these new “things” in the “telescope”?).
This made me realize that we had no documentation, no schematics, no parts list, nothing. And If I ever had to fix something, I also had no idea about how it was supposed to work… and it’s difficult to learn how something works when it is broken and it does not do so.
So I begun a long (and somehow funny) work of reverse engineering the Compustar hardware and software, figuring out how the different hardware parts of the circuit were working in conjunction with the software. I’ll write more about the Compustar hardware in a future post, summarizing my findings about how it’s internally working. For now I just want to say I’m very impressed by how it was designed. It is a real masterpiece, given the constraints the original designer (who is, I suppose, Mike Simmons, since his name is written in the software itself) had to face in the 1986. One thing above all: RAM was expensive back then, and the whole Compustar is running in just 256 bytes!!
This work made me discover a few bugs (very few bugs, actually, especially for a software that was written for sure in assembler), and at the same time made me think about improvements and new ideas…. and therefore an emulator was literally required to deeply understand all the details and eventually try all the (software) modifications I might want to do. But this is the subject of (another) future post.
The first release was ready in 2013, but at the time it was not a really finished software and then I didn’t think it could be generally usefull, so (I’m lazy, remember) I didn’t publish it anywhere.
The decision, last year, to build this new site with my friend Marco made me change my mind and so, at last, I’m now (finally) publishing it.
For those who don’t know what a Compustar is…
Unfortunately there is no much information about the Compustar in internet. It’s an handheld dedicated computer made by Celestron in 1986 (I think) to drive 11″ and 14″ telescopes. It was very advanced for 1986, but it is still very usable today: it’s just missing the moon and the planets but the object catalogue is quite complete.
If you want to play, start by pressing the BEGIN button and follow the instructions by entering the (night!) time, the date (choosing a year before 2000: the Compustar was not Y2K ready) and your coordinates (you can also make them up). The telescope will then slew to REF star 11 (POLARIS). Press ENTER again and the telescope will slew to an alignment star choosen based upon the location and the time you entered before. Press ENTER for one last time and the setup and alignment procedure has been completed. You may now slew to some other object: let’s choose, for example, Messier object M81: press SLEW, then M (for Messier) then 81 and finally press ENTER. You will hear a beep and the telescope will start slewing to the coordinates of M81 after having shown a few informations about the object itself.
The software
The main software interface is very similar to the Compustar itself. You can press any button by clicking with the mouse or using the keyboard (a tooltip on the white button square will tell you the corresponding key).
 The View menu will allow you to change the “Low battery” and “Daylight” conditions (which will simply change a label on the Compustar display), enable and display both joysticks (click and drag the big yellow ball to move the joystick, while the two white triangles are the joystick buttons).
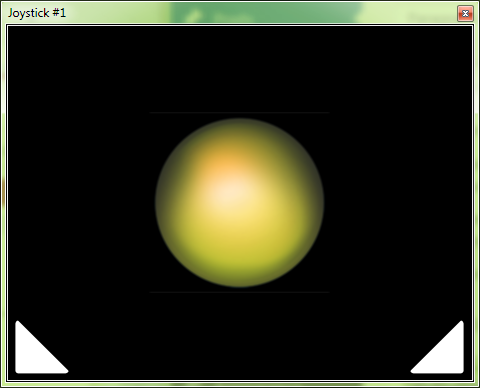
This menu also shows all the “debugging” features of the emulator (which I may describe in a future post, if there is enough request: they are very complex and require a deep knowledge of the 8051 processor).
The Options menu will allow you to select (and run) a custom firmware and to change some emulation details (like the serial port device, so you can try to control the emulator – and the Compustar itself – from some external device).
The File and About menus are just what they are.
You can download the installer here, less than 2 MBytes

Revision history
v 1.01, 27 Oct 2013
- Fixed: “Add Breakpoints” dialog, which was missing default values
- Fixed: bit change in Memory/SFR (wasn’t working)
- Added: Breakpoints on CODE memory read
- Added: Maximum breakpoints is now 8 per type (was 4 per type before)
- Added: use of keys (0-9, plus ‘.’, ‘-‘, ‘s’, ESC, BACKSPACE and ENTER) to press compustar pushbuttons
- Added: Keyboard shortcuts
- Added: Reload List & Eprom files on Compustar reset if changed.
v 1.02, 28 Oct 2013
- Added: Option in settings to force the reload of the emulator files (if changed) during a Compustar Reset
v 1.03, 9 Dec 2013
- Fixed: Main window save&restore position
- Fixed: Run time error if list file was not valid
- Fixed: Unwanted white border around buttons on Windows 7
- Added: Experimental “Motor Phases” debugging window. Being experimental, it’s not shown by the “Show All” menu option.
v 1.04, 12 Apr 2014
- Fixed: Settings/Serial Port/Windows serial port has been renamed to “Physical serial port” to avoid confusion with “Serial port window” which has been renamed “Terminal window”
- Added: Terminal window is now resizable and its output text can be selected & copied
- Fixed: Run time error when removing code breakpoints without a list file being loaded
- Fixed: ESC was not cancelling the “Add Breakpoint” dialog.
- Added: “Desc” (description) file to colorize RAM locations
- Fixed: Battery voltage is not a fixed value, but now changes randomly within the normal or low battery range.
v 1.05, 18 May 2014
- Added: Emulation of NVRAM and DS1643 on socket D (addresses 0x2000-0x3FFF)
- Fixed: List & Eprom files weren’t reloaded if the Compustar reset was made using the Code window toolbar reset button
v 1.06, 13 Aug 2014
- Fixed: Uptime counter is now 64 bits, so it will no longer restart from 0 after 4200+ seconds
- Fixed: DS1643 emulator will now emulate also its startup time, starting to work 35ms after a powerup/reset
v 1.07, 28 Oct 2014
- Fixed: Changed battery voltage from the totally random value to a time dependant slow changing value with an added small random quantity. It should simulate more realistically a real battery.
v 1.08, 27 Jan 2017
- Added: About form
- Chngd: Store registry settings information in HKCU\SOFTWARE\A&M\CompustarEmulator
- Added: ASEM-51 list file
v 1.09, 6 Dec 2017
- Added: Terminal emulation for the serial port input which I assumed is connected to the “Carrier Detect” input (since the Compustar has a pre-standard DB9 connector)
- Fixed: Improved emulation of I/O pins
- Fixed: Adding breakpoints in hex for addresses >= 0x8000
- Fixed: race condition in Serial Port Tx logic
- Fixed: Improved emulation of mismatched code EPROM size and A15 Jumper
- Fixed: Edit window for the PC register (in the register/SFR window) was on single click instead of double click and was displayed incorrectly if >= 0x8000
- Fixed: Buffer too small that could corrupt CODE memory cache
v 1.10, 27 Dec 2018
- Added: ISR profiling window
- Fixed: Core status when load error occurred
- Added: Dome serial port output emulation. Data are output at the correct baudrate (1709 bps), but there is an option to use 2400 bps in case your serial port hardware does not like this unusual bitrate value.
- Fixed: DS1643 time difference is now computed (and stored) in UT. This may cause an incorrect DATE/TIME if a value has been stored by a previous emulator version, but should remain correct from now on even when DST changes.
- Added: “Ghosted display” option to see a dimmed version of the “not lit” displays and digits.
- Added: “Ghosted display”, “Mute audio” and “Sticky Buttoms” options are now saved in the registry and therefore preserved between sessions.
v 1.11, 12 Nov 2019
- Added: Max “Full” ISR duration (counts also the time when ISR has been interrupted by an higher priority ISR)
- Added: Clear ISR statistics button
- Fixed: Emulation of MOVX @Rx,A and MOVX A,@Rx instructions which were not 100% correct
- Added: Emulation of ADC0809 conversion time (208µS)
- Added: Software breakpoint on (unused) opcode 0xA5. Can be disabled by setting HKCU\Software\A&M\CompustarEmulator\HWOptions\SWI (DWORD) to 0
- Added: Support for new Dome serial port for firmware 1.81+
- Added: Configurable EOI detection on ISR Profiler window
- Added: Code labels CAN be used for breakpoints in the Add Breakpoint dialog with ASEM51 listing
- Added: Support for display dimming
- Fixed: race condition when closing the terminal/dome serial port
- Fixed: Glitch in playing sounds
5 commenti
Vai al modulo dei commenti
I tries this and I am impressed! These Compustars are Great instruments and hopefully will be around for a long time.
I haven’t been able to try it outside – Yet – Cloudy and wet! Hopefully in a few days. You put a lot of time and work in this – Much appreciate for sharing this with us. I also looked at Your Gallery of photo’s – Very impressive work – I plan on looking at more, and hope one day to be taking photo’s, too.
Thank-You, Gerry-Lynn
I have 3 compustars…..love them. The 8″, 11″, and 14″ . I am a little confused by your emulator. Is there any way for this emulator to connect with the original compustar equipment to control the moun?
Thanks!
Randy
Autore
No, it’s just an emulator: it does exactly what the original Compustar does, except driving the motors. But it also doubles as a debugger for the Compustar code, and this helped me a lot to develop something I’ll post this month, if everything works out as planned.
Ciao
Besangelo
I am a little confused by your emulator. Is there any way for this emulator to connect with the original compustar equipment to control the moun?
Autore
No. It just emulates the Compustar to learn its use and to test new firmwares.
Driving the stepper motors from a PC software with the tight timing required is pretty hard and therefore I didn’t even try.
Ciao
Angelo